
Building a Markdown Blog with SvelteKit
Jul 28, 2024
Hey! I’m Bahadır, a recent graduate in Computer Engineering from METU. Welcome to my blog where I’ll dive into technical topics, share my projects, and occasionally talk about my personal experiences.
This is my first summer in a long time where I have some free time. I’m not a front-end developer, nor do I strive to be one. My focus has always been on real-time, critical systems, with my favorite course being Operating Systems (sigh). However, I’m a tinkerer, enthusiastic about coding and design, and I enjoyed building this website from scratch.
Table of Contents
- Why build a website yourself?
- Technology Stack
- Cost and Performance
- Inspirations
- Next Steps
- Conclusion
Why build a website yourself?
While services like WordPress offer a quick start, building it yourself allows you to have complete control over every aspect, from design to functionality, and it’s a rewarding learning experience. Moreover, it’s significantly cheaper to create your website.
Technology Stack
I chose a modern stack to ensure my website is fast, customizable, and efficient. Here’s a breakdown of the key technologies I used.
Svelte with SvelteKit
Static websites are extremely fast and cost-effective. While they don’t suit dynamic web applications, they are perfect for personal websites.. It’s built on top of Svelte, a powerful tool that compiles your components into highly efficient JavaScript code.
Static Site Generator
Static websites are extremely fast and have lower costs. They don’t work for web applications, but they are perfect for personal websites. You can turn SvelteKit into an SSG (static site generator) by just adding this line in svelte.config.js:
export const prerender = true;SvelteKit’s static site generation makes my blog extremely fast, which enhances the user experience, boosts SEO, and reduces costs.
Intuitive Routing
Svelte’s routing system is intuitive. Basically, I have this project structure.
- src
  - ...
  - routes/
    - blog/
      - [slug]/
    - photos/
    - stack/
    - tools/
    - ...
It’s exactly what you see on my website! bahadiraydin.com has /blog, /photos, /tools, /stack. No additional steps are required. This is just one example of its many capabilities. I encourage you to explore Svelte!
Great Community
The Svelte community is not as big as React or Vue, however, official Svelte documentation is great and the hacker community around the Svelte ecosystem has published top-tier libraries and guides. Here’s a particularly useful guide that helped me create my website.
TailwindCSS
I hated CSS before using Tailwind. The standards are essential in producing high-quality code. Vanilla CSS is just too complex and impossible to organize. Tailwind is a utility-first CSS framework. Here is a blog post written by the creator of TailwindCSS. Best practices don’t actually work.
MDsveX
MDsveX is a Markdown processor for Svelte. While you can write blog posts in HTML, it’s too much work to do that for every new post. Also, it is bad for consistency as you will most likely do different styling each time. That’s why I (and most people writing blogs) use a Markdown processor to generate a consistent and well-known style for their articles.
MDsveX streamlines blog post creation using Markdown, a familiar and consistent format for writing content. While it’s powerful out of the box, I enjoy customizing the styling for a unique touch. However, I encountered minor problems with MDsveX. For instance, to add line numbers to my code blocks, I had to research extensively through the docs and Github issues. Custom styling for auto-generated sections of the Markdown was also a pain, as I couldn’t find any guides for it on the internet. The MDsveX docs lack examples. Nonetheless, it is a great tool:
Pros
- Support for remark and rehype plugins which makes it much easier to generate beautiful content.
- Syntax highlighting
Cons
- Not actively developed anymore.
- While not essential it has missing features.
Here is an example of custom styling:
<script>
    export let href;
    export let target;
</script>

<a class="hover:text-blue-900" {href} {target} rel="noopener noreferrer" > <slot /> </a>
This is a simple <a> component tag I defined. However, important things are happening here:
- I configure MDSveX so that each link in my generated Markdown, is converted into this.
- My custom component can get props (information) from Markdown-generated tags: href and target
- I add noopener, noreferrer to each link to protect my website and my visitors from reverse tabnapping
Note: Adding “noopener” and “noreferrer” is redundant as of 2023. Modern browsers fixed this issue by adding each link that opens in a new tab implicit rel=“noopener”.
Plugins I Used
- Shiki for syntax highlighting.
- Shiki Transformers to extend the capabilities of Shiki. It gives great syntax highlighting options that I’ll be showcasing in upcoming posts.
- rehype-autolink-headings for giving IDs to the headings. So I can style it and scroll to it.
- remark-toc for auto-generating a table of contents, like the example in this section.
- remark-gfm to enable Github Flavoured Markdown.
- remark-unwrap-images to remove paragraph tags around images.
- mdsvex-reading-time for quickly auto-generating the reading time.
Remember, none of these take away our runtime. It is all statically prerendered!
Deployment
- I’m currently using Cloudflare Pages to deploy my website. The platform’s user-friendly interface made the process straightforward, best deployment service for static websites.
- I’m currently using Umami for analytics. It has a great free tier and is easy to set up.
- I got my domain from namecheap
CDN
- I’m using Cloudinary to host my images, using the free plan. It substantially boosted performance and made managing my photos easier.
Assets
- SVGRepo for icons.
- favicon.io to generate my favicons.
- GIMP to edit and crop photos.
Cost and Performance
Throughout this whole process, I only paid for my domain. It was something like 6$ annually. The free plans I’m using right now are serving me very well however I might reconsider my position and service choices depending on my traffic. Here is my latest Lighthouse score:
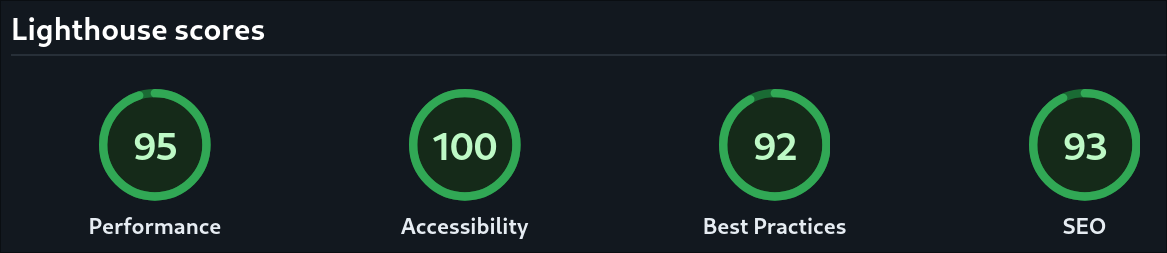
Not all 100 sadly.
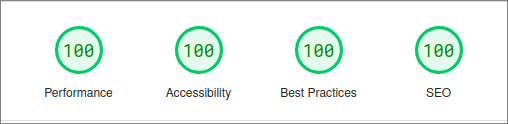
Update: I have added a few more optimizations and now I have a perfect score! (Aug 12, 2024)
Inspirations
While I was designing my website I was inspired by:
Next Steps
I plan to add more custom styles to my blog as needed. Despite my busy schedule, I will maintain and update this blog regularly. Here’s what you can expect:
- Sharing my projects.
- Posting tutorials and guides on various software-related topics.
- Creating a section dedicated to exploring cinema.
- I’m planning to open source this website on GitHub.
Conclusion
I hope you found this post helpful! Feel free to contact me. If you have any questions, I’d be glad to help and I’d be happy if you have suggestions for my website.